Wainscoting is a classic wall treatment that adds character, texture, and elegance to a room. It has been used in various architectural styles for centuries, offering aesthetic and functional benefits. Whether you’re looking to add a touch of traditional charm or create a modern look with textured walls, wainscoting can be a great addition to your home.
In this article, we’ll dive into the history of wainscoting, explore its various types, and discuss installation methods and creative ways to use it in your home.
Contents
1. What is Wainscoting?
Wainscoting refers to wooden panelling applied to the lower half of a wall, usually between 3 and 5 feet in height. Originally, wainscoting protected walls from damage, especially in high-traffic areas like hallways and dining rooms. Over time, it evolved into a decorative feature that enhances the look of a room by adding texture and detail.
Today, wainscoting can be made from various materials, including wood, MDF (medium-density fiberboard), plastic, or ceramic tiles. It’s commonly installed in dining rooms, hallways, bathrooms, and bedrooms but can also be used in other areas for a sophisticated, polished look.
2. The History of Wainscoting
Wainscoting has a long and rich history that dates back to medieval Europe. It was first used in the 16th century in England, primarily as a practical solution to protect walls from moisture and drafts in cold, damp homes. “wainscot” comes from the Dutch word “waegenschot,” which refers to the best timber cut from oak trees used for wall panelling.
In its early use, wainscoting was applied to the entire wall to create a warm, insulated surface in rooms made of stone or plaster. As architectural styles evolved, wainscoting became a decorative element that adorned only the lower portion of the walls, leaving the upper part for wallpaper, paint, or other finishes.
By the 18th and 19th centuries, wainscoting had become a staple in Georgian, Victorian, and Colonial homes, adding elegance and formality to living spaces. It continues to be a popular feature in traditional and contemporary interiors.
3. Types of Wainscoting
There are several types of wainscoting, each offering its unique style and benefits. The choice of wainscoting will depend on your taste, the architectural style of your home, and the look you want to achieve. Here are the most common types of wainscoting:
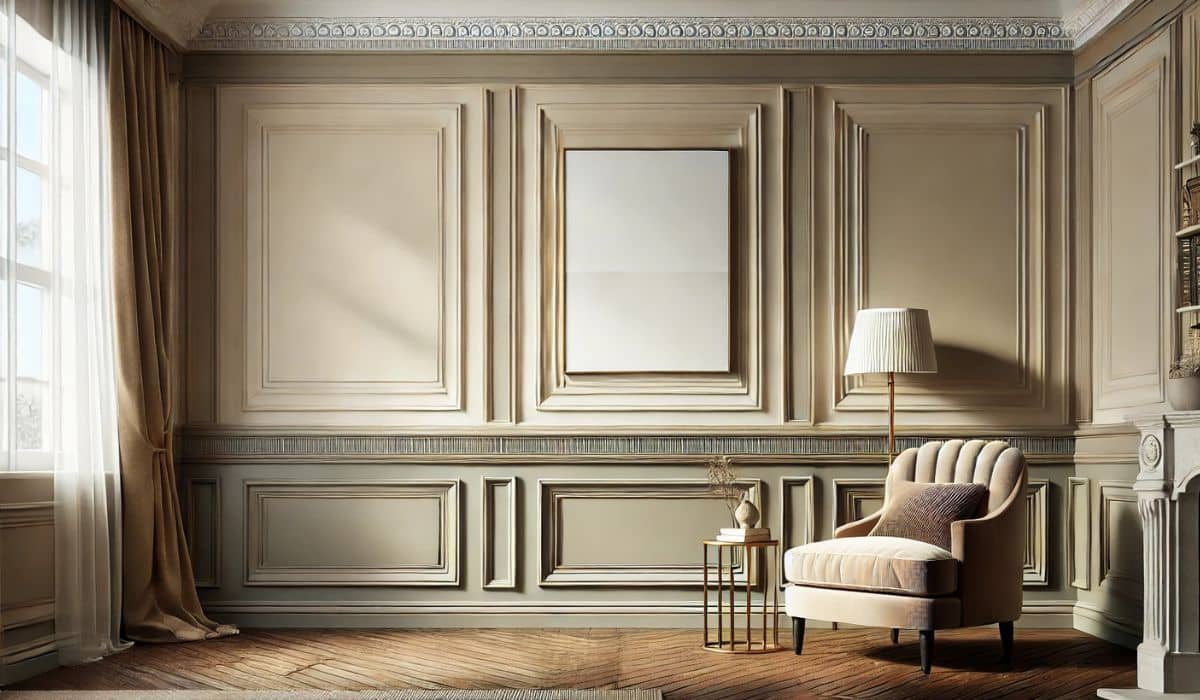
a. Raised Panel Wainscoting
Raised panel wainscoting is the most traditional and formal type. It features panels raised from the wall’s surface, creating a three-dimensional effect. This style is often associated with grand homes, classic libraries, and dining rooms. Raised panel wainscoting is typically made from wood or MDF and is commonly found in Colonial and Georgian-style homes.
- Best for: Formal dining rooms, living rooms, and entryways.
- Style Tip: Pair it with rich colours or wallpaper to create a dramatic, luxurious look.
b. Flat Panel (Recessed) Wainscoting
Flat panel wainscoting, also known as recessed or Shaker-style wainscoting, features flat panels that sit behind the stiles and rails, creating a clean and simple design. This style is versatile and works well in both traditional and modern homes. It’s less ornate than raised panel wainscoting, making it an excellent option for a more minimalist aesthetic.
- Best for: Modern or transitional homes, bedrooms, and kitchens.
- Style Tip: Paint it in white or light neutral colours for a crisp, clean look.
c. Beadboard Wainscoting
Beadboard wainscoting is one of the most popular and widely used styles today. It consists of vertical planks (or beadboards) with grooves between them. This style gives a room a casual, cottage-like feel, making it a popular choice for coastal or farmhouse interiors.
- Best for Bathrooms, kitchens, hallways, and laundry rooms.
- Style Tip: Use it in a bathroom or kitchen for a traditional, charming look. Pair it with white or pastel colours to enhance the beachy or farmhouse feel.
d. Board and Batten Wainscoting
Board and batten wainscoting is a style that involves wide vertical boards spaced apart and covered by narrower strips of wood (battens) over the seams. This style creates a linear, geometric look, ideal for contemporary or rustic homes. It’s often used on both exterior and interior walls.
- Best for Bedrooms, living rooms, and home offices.
- Style Tip: Use board and batten wainscoting in larger rooms to add visual interest and texture without overwhelming the space.
e. Overlay Wainscoting
Overlay wainscoting combines elements of raised panel and flat panel styles. It consists of flat panels with additional decorative moulding placed over them to create a layered effect. This style adds depth and dimension to a room while maintaining a classic, elegant appearance.
- Best for: Dining rooms, libraries, and formal living rooms.
- Style Tip: Use contrasting colours on the overlay and base panels for a bold, modern twist on a traditional design.
4. How to Choose the Right Wainscoting for Your Space?
Choosing the correct type of wainscoting depends on several factors, including the architectural style of your home, the room’s function, and the look you want to achieve. Here are some tips to help you make the best decision:
- Consider Room Size: Opt for lighter, simpler styles like beadboard or flat panel wainscoting in smaller rooms to avoid overwhelming the space. More elaborate styles like raised panels, boards, and batches in larger rooms can add drama and interest.
- Match Your Home’s Style: If you have a traditional home, a raised panel or overlay wainscoting can enhance the period look. Flat panels, boards, and batches offer a clean, contemporary feel for modern homes.
- Room Functionality: To protect walls from scuffs and damage in high-traffic areas like hallways or mudrooms, opt for durable materials like MDF or plastic wainscoting. In bathrooms and kitchens, beadboard wainscoting can add charm while also resisting moisture when appropriately sealed.
5. Wainscoting Height and Proportions
When installing wainscoting, one of the most important considerations is its height. The general rule of thumb is that wainscoting should cover the lower third of the wall, but the specific height will depend on the size of the room and ceiling height. Here are some guidelines:
- Standard Height: Wainscoting is typically installed 32 to 36 inches from the floor, but in rooms with taller ceilings, you can go higher—up to 48 inches.
- Ceiling Height: Keep the wainscoting lower in rooms with low ceilings to make the space feel taller. In rooms with high ceilings, taller wainscoting can add balance and proportion.
- Custom Look: For a more dramatic effect, consider installing wainscoting up to 5 feet high or extending it up to two-thirds of the wall for a grand, formal look.
6. Wainscoting Materials
Traditionally, wainscoting was made from solid wood, but today, various materials offer different durability, cost, and maintenance benefits. Here are the most common materials used for wainscoting:
- Wood is the most traditional and authentic material for wainscoting. It’s durable, long-lasting, and can be stained or painted to match any décor. However, wood can be more expensive and requires regular maintenance to prevent warping or cracking.
- MDF (Medium-Density Fiberboard): MDF is a popular choice for wainscoting because it’s affordable, accessible to work with, and resistant to warping. It’s ideal for painted wainscoting but cannot be stained like wood.
- Plastic (PVC or Vinyl): Plastic wainscoting is durable, waterproof, and low-maintenance, making it ideal for bathrooms or kitchens where moisture is a concern. It’s available in various styles, including beadboard and flat panel.
- Ceramic Tile: For a modern twist on traditional wainscoting, ceramic tiles can cover the lower portion of walls in bathrooms or kitchens. This option is durable, waterproof, and available in various designs.
7. Installation of Wainscoting
Installing wainscoting can be a DIY project, but it does require precision and the right tools. Here’s an essential step-by-step guide to installing wainscoting:
- Measure the Walls: Start by measuring the walls where you plan to install the wainscoting. Mark the desired height using a level and pencil.
- Cut the Panels: If using prefabricated panels, cut them to fit the wall’s dimensions. For custom wainscoting, you’ll need to cut each piece individually.
- Attach the Panels: Use construction adhesive and nails to attach the panels to the wall, ensuring they are level.
- Install the Stiles and Rails: Install the vertical stiles and horizontal rails over the panels. Secure them with nails or adhesive.
- Caulk and Paint: After installing the wainscoting, caulk the seams and edges for a smooth finish. Finally, paint or stain the wainscoting to match your desired look.
Conclusion
Wainscoting is a timeless design feature that adds elegance, texture, and Personality to any room. It can fit seamlessly into traditional and modern interiors with various styles and materials.
Whether you opt for classic raised panel wainscoting in your dining room or rustic beadboard in your bathroom, this versatile wall treatment will surely enhance the look and feel of your home. Considering your room’s size, style, and function, you can select the perfect wainscoting to elevate your space for years.